It’s time to clean! Washing your brushes will ward off bacteria and extend the life of your makeup. But for most people (including myself) we just don’t do it often enough. You can use a brush cleaner to de-gunk, but you should “deep clean” using soap and water about once every six to eight weeks. Good brushes don’t come cheap and will last a lifetime if they are properly taken care of. I store my personal brushes upright in a glass apothecary jar that I got from the Container Store. An old mug or a toothbrush holder work just as well. If you keep your brushes in a drawer or bag, just make sure the bottom is kept clean.
List of stuff you’ll need:
- Mild dishwashing soap or baby shampoo (I like Dawn or Johnson’s Baby Shampoo)
- Small dish
- Paper towels
- Clean hand towel or dish towel
- Warm water
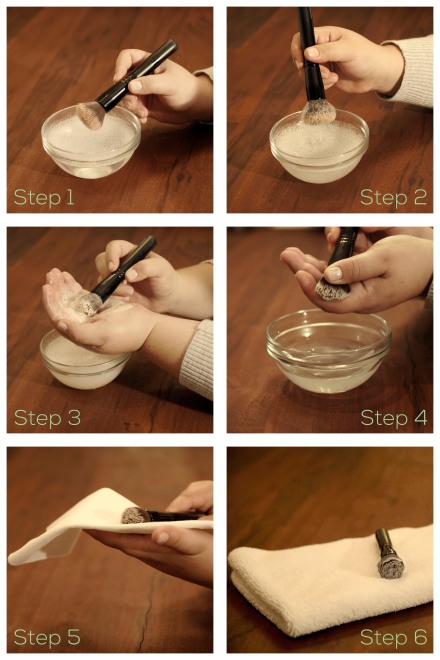
Start with some soap in a small dish and add warm water. Hot water can melt the glue that keeps the brush handle and bristles together. Place the brush in the soapy water and swirl around. Some brushes (usually synthetic ones used for foundation and creams) will take a little more “scrubbing”. For those, add a couple drops of soap to your palm and swirl the brush to create a lather. Remember not to push the brush directly into your palm. This will bend the bristles and can cause more damage. Instead, hold the handle at a 45 degree angle. Make sure there’s no makeup residue left and rinse until the water runs clear. Using a paper towel, gently squeeze the water from the brush and place on a clean towel to air-dry. Try not to speed up the drying process by using a blowdryer, since the heat can also melt the glue on the brushes. I find it easiest to clean before bed so they can dry overnight and are ready to use in the morning.